Tuesday, September 3, 2013

It's Pumpkin Time!

Hehe! 
Sorry I have been MIA, but you will be happy to know (or at least I hope you are) that I finally finished my Bachelor of Science and my diploma came in the mail on Saturday! {{{{Yayy!!!!}}}
However, I am now onto my post bacc program, which means I'm still a student . . . and as such, have a student's budget. Did I mention that we are like the king & queen of all things pumpkin at my house? Or so we've been told, by my very close friend who asked me how to make pumpkin butter last fall . . . She knows who she is. lol And I love her!!! :)

Ok, so Saturday the hubby was whining about craving a Pumpkin Spice Latte . . . in August (barely). . . whilst we were picking out Orange paint for our living room.  The decade of my Island Palm (green) living room is coming to an end. 
Which got me thinking . . . I could make that stuff on my own and we could have Pumpkin Spice Lattes whenever we want. I had discussed making my own simple syrup with another friend earlier in the summer, to put in my cold brewed coffee . . . and came across the delight that is Rich, Simple Syrup. I had added a vanilla bean to it, sliced lengthwise, during the simmering process.  I doubled the batch & refilled the Starbucks' Vanilla Spice Syrup bottle I had just emptied. 
So, this time I decided to jump off the bridge and delve into Pumpkin Spice Syrup. I looked up a few recipes. One   didn't have enough pumpkin, did I mention we really love pumpkin at our house? Another didn't make enough to last a weekend at our house. However, they got me thinking and that is the important part.

So here is what I did.
Started with my Rich Simple Syrup: Which can use any variation of sugars. If you really like Frapuccinos, I recommend half Brown Sugar half Turbinado Sugar! You're welcome!
2 cups cold, filtered water
4 cups of sugar
Bring to a simmer and turn down heat (don't wanna scorch it) and stir until sugar is dissolved, then for five more minutes.  Do not continue to simmer, we are not trying to make caramel here.
Now, if you want to flavor the syrup, add your seasonings before adding heat. However, in this case, I waited until it was done to add the pumpkin.

To make Pumpkin Spice Syrup I added
- a vanilla bean sliced lengthwise
-Cardamom, Cinnamon, Ground Ginger, Nutmeg, Ground Cloves & Allspice to taste. Start with a little. You can always add more.  Too much Cinnamon or Nutmeg, especially can get bitter.


After the sugar is dissolved and you have removed the pan from heat, add 1 cup of pumpkin puree and stir well.  Let the syrup cool. Just before transferring it to a jar, add 2 Tbsp of Vodka to increase its shelf life.
Now, my vanilla syrup (with the vodka) was fine at room temperature for 2 months, but I'm not taking chances on the pumpkin going bad here. I'm refrigerating that stuff!!!
So let's recap:
Items needed:
-2 cups cold, filtered water
-4 cups of sugar, your choice
-1 vanilla bean (or more if you wanna go crazy here!)
- Warm kitchen spices of your choice (cinnamon, allspice, cloves, ginger, cardamom & nutmeg/mace) or you can go for just Pumpkin Pie Spice.
-1 cup of canned pumpkin puree (Not the bigger jar of Pumpkin Pie Mix, it is runnier and already has spices in it).
-2 Tbsp Vodka
-Storage Jar.

This makes roughly 42 oz.
I am gonna try to make a sugar free version with stevia . . . It will be a smaller amount and I'm not even sure if it will be successful, but if it is, you WILL hear about it!

Sunday, April 21, 2013

Rhubarb Season!!!


Did you know it is the start of Rhubarb Season?

My hubby is a huge rhubarb fan and, in the right recipe, I am too.

I could never find a recipe that quite fit what I was looking for, so a few years ago, this is what I came up with:

Filling:
2 quarts of strawberries, trimmed and sliced
3/4 lb of rhubarb stalks, chopped coarsely
zest of two clementines (mandarin oranges) & 1 small organic lime (it was all I had)
1/2 c or so Of orange juice (I juiced the Clementines and Lime)
12 Tbsp of granulated sugar (I used turbinado because it was what I had on hand)
3 Tbsp. of Tapioca (to thicken)
Cook over medium-low heat until juices are thickened.
Let rest, covered for a couple of hours (this lets the flavors meld)

Topping (sweet biscuit type):
2 cups of Buttermilk baking mix
1/2 cup of turbinado sugar, brown would work well too
1/2 cup of milk (can substitute almond, soy, etc. if you are vegan or sensitive to dairy)
blend until just mixed.

In a 9x13 inch casserole pan, spray likely w/ Pam cooking spray.
Pour filling in
Spread topping buy spoonfuls over the filling.
Bake at 350 until topping is golden brown.
Allow to cool.

Serve as is or with vanilla ice cream.
Enjoy!


You can also double the rhubarb and omit the strawberries if your are like my hubby and a HUGE rhubarb fan!

As soon as I get the first one of the season made, I will add photos!

Wednesday, December 19, 2012

Holiday Wish List

Just a few things that have caught my eye this year:

A Lodge Logic Reversible Griddle


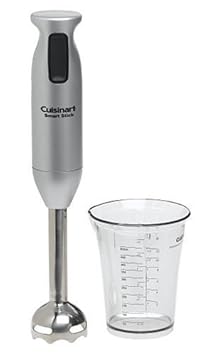
A Cuisinart Immersion Blender


Keurig B70 Platinum Brewer (we have one of the first Keurig Brewers, which was fine when it was just me drinking coffee, but the Hubby has recently began drinking three to four cups per day . . . and my water reservoir is too small for both of us.)
Keurig® Platinum Plus Brewing System

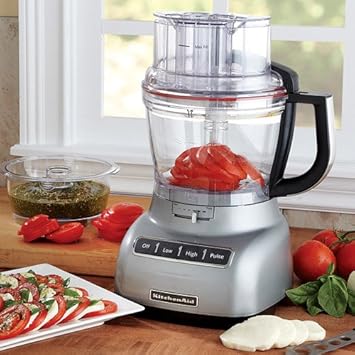
KitchenAid Food Processor


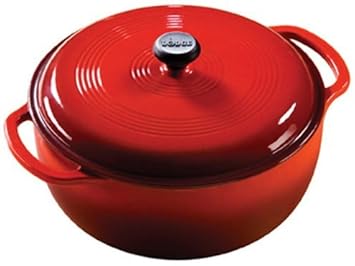
Lodge Logic Dutch Oven


Samsung Galaxy Note 10.1

So, what is catching your eye this season?
Happy Holidays all!!!

Tuesday, December 18, 2012

Non-Stick Pizza?


Do you make pizzas, even frozen pizzas, at home?

Have you sprayed you pizza pans with non-stick spray before putting the pie on it?

Or is it just me? Figures.

Well, I have and the spray seems to make the crust brown too much.

So I took a twist on what the pizza parlor down the street from where I grew up (and I'm pretty sure most do) do to keep their fresh pies from sticking.  Corn Meal!!  Well, in my house polenta, because I have a ton on hand and I'm the only one who likes polenta, grits or other corn meal-esque meals.

The corn meal keeps them from sticking, without affecting the crust in a negative fashion.  And it makes cleaning up so easy!  I just brush the leftover corn meal into my compost bucket, soap the pan up, rinse and set upside down on my oven rack to air dry!

And an aside, this also works with doughy dishes like my buffalo chicken roll, etc.

Oh, you should also use the ugliest seasoned pizza pans in the county! :)


Monday, July 2, 2012

Fruit infused water . .

I've been making some changed in my diet . . . mostly just moving closer to vegetarian/vegan . . .
I was a vegetarian for 10 years, then in 2001 after I had my gall bladder out my surgeon advised me to add 2 to 3 servings of lean chicken per week to get me enough protein so I could heal.  I couldn't handle more than 12 grams of fat per day for at least 9 months post op.

Any who, for the last six months, I have been down to one soda per day max.
Last week, I cut out all soda.  I've been on a fruit infused water kick . . . watermelon & lime, mixed berries, granny smith apple (not very strong, but it is there!) and clementine.

I was chopping up fruit last night and decided to try putting the mango pit in a Mason jar and cover with cool water. I can never get all of the pulp off of the stone. After I put it in the jar, I scraped the dickens out of it with the back of a fork.

I let it sit overnight, remove the stone. Top off with more water and refrigerate . . .

Or, if you are anxious to get one going, like I was for my watermelon one this morning.

Fill a water bottle with Ice and pour the mixture over it. Cap and enjoy!  Refrigerate any remaining amount.

Saturday, June 23, 2012

39dollarglasses.com

Two Fridays ago, my hubby and I had our eye appointments.  Neither of us had had new glasses in many, many moons.  For him it was ~5 years, for me it was more like 7.  Ok, my frames were 7 years old and so was one of my lenses, but I had 1 lens swapped out 6 years ago.  Since then. my prescription hadn't changed and my glasses were in fairly good shape.
I snagged a copy of my prescription and went online for sunglasses.  I had had a coupon for Coastal.com that would make them $25, plus $10 in shipping.  It had expired.  I had read several reviews online and seen videos on YouTube reviewing their service.  When I went to purchase said glasses, they were like $70 with shipping.  I just couldn't justify spending that without a little research.
I found some glowing reviews from www.39dollarglasses.com  so I went to check them out.  I immediately found a pair I liked.   Shipping was reasonable, $5.95 USPS Priority and there was a coupon code for 10% off.  Total Shipped was $50
They come with UVA/UVB & Scratch Resistant coating and Resin Lenses.  I have a pretty heft prescription (-2.50 (with prism for astigmatism) and -4.50) and I elected not to get polycarbonate.  Would they have been lighter, yeah, but you can't tell how thick they are since they blend in rather well with the frames.  Since they aren't for full time wear, I don't mind!


The glasses come with an adjustment screwdriver for your keychain, a microfiber cleaning cloth, microfiber bag and hard clamshell case.
Please note that I have not been paid or offered merchandise by 39dollarglasses.com
Nor am I affiliated with them in anyway!

Friday, June 1, 2012

Roasted Red Peppers

I cannot remember where I saw a tutorial on how to roast red peppers.  Obviously, it was a cooking show, but I cannot remember if it was the Food Network or PBS . . . I've been doing it for over ten years.  I've learned a few tricks along the way.
Roasted Red Peppers (well, you can pretty much use the same technique to roast ANY pepper) are great on sandwiched, in pasta sauce, blended in with pesto . . . the list goes on and on!
The summer before I got married we had a HUGE garden! Nom!  I was cooking down tomatoes and roasting peppers all summer . . . saving the best ones for our wedding feast! Chicken scallopini and lasagna with homemade sauce, including roasted red peppers.

This is an awesome way to use sad, soft, wilting peppers.  They can be stored in a jar, covered with olive oil, in the fridge and/or frozen.  This week, I found some huge red peppers on sale at Chuppa's for $0.99 a lb.  They were a little soft, but perfect for roasting!
Wash them, Cut in half and remove pith by pinching it away from the flesh. Rinse the inside of the peppers with cool water.
There were a couple of really firm chunks that I diced up for hubby's salad and as a snack for me!  I <3 sweet red peppers!
 
You can easily roast peppers on the grill, in the oven under the broiler or [as I chose to do this week] in the toaster over under the broiler.
Roasting evenly can be tricky. I have found the best way is to cut them into chunks so the flattest surface is level with the broiler element/flame.

You want the skins to get blackened, this allows the steam to separate the skin from the flesh.
 
 Getting there . . . . I found that if I stopped staring at them, I wasn't nearly as bored.

Perfect!  Now, carefully remove them from the oven and plop them in a ziploc bag to sweat.
If you do it like I did, it will take several rounds, just keep adding peppers, zipping the bag shut in between.  Sweating them allows them to cool and the skin loosens.
The skin should easily push away with a slip between your thumb and forefinger.
Perfecto!!!  Now, if you're gonna use them right away, slice them up and put them in your pan, food processor, etc.  I didn't have a use for them right away, so I put them in a Mason jar and topped it off with olive oil.  The oil gets a nice smoky flavor.  You can pour some out and dip bread in it . . . or whatever else tickles your fancy!  Just remember to top the jar off.
I peeled about half of them, but found the middle to still be really warm.  So I sealed the bag back up and spread the chunks out in the bag (gallon size for the 3+ lbs I roasted last night) and set it on the counter to finish cooling off.
I saw a recipe on Pinterest for Grilled Goat Cheese, spinach and avocado sandwiches . . . I'm gonna add a little roasted red pepper too!
Enjoy!!!!